
How to Sew a Fabric Face Mask
In the current context of the ongoing pandemic, all necessary precautions must be taken. Everybody needs to wear a face mask. It is not very practical to buy disposable ones, because you can wear them for no more than 2 hours. That is why today we are going to tell you how to sew a fabric face mask at home.
The design consists of two fabric layers and a pocket for a filter. Even beginners can sew such a mask. Read on for step-by-step instructions.
How to Sew a Fabric Face Mask
You will need:
- 2 pieces of cotton fabric 20 cm by 30 cm (8 inches by 12 inches)
- 1 piece of filter material 20 cm by 30 cm (8 inches by 12 inches)
- 2 elastic bands 15 cm (6 inches) each
Instructions:
Pattern building might seem frightening, but in truth, it’s pretty easy. The main thing is to draw everything step by step, without deviating from the pattern.
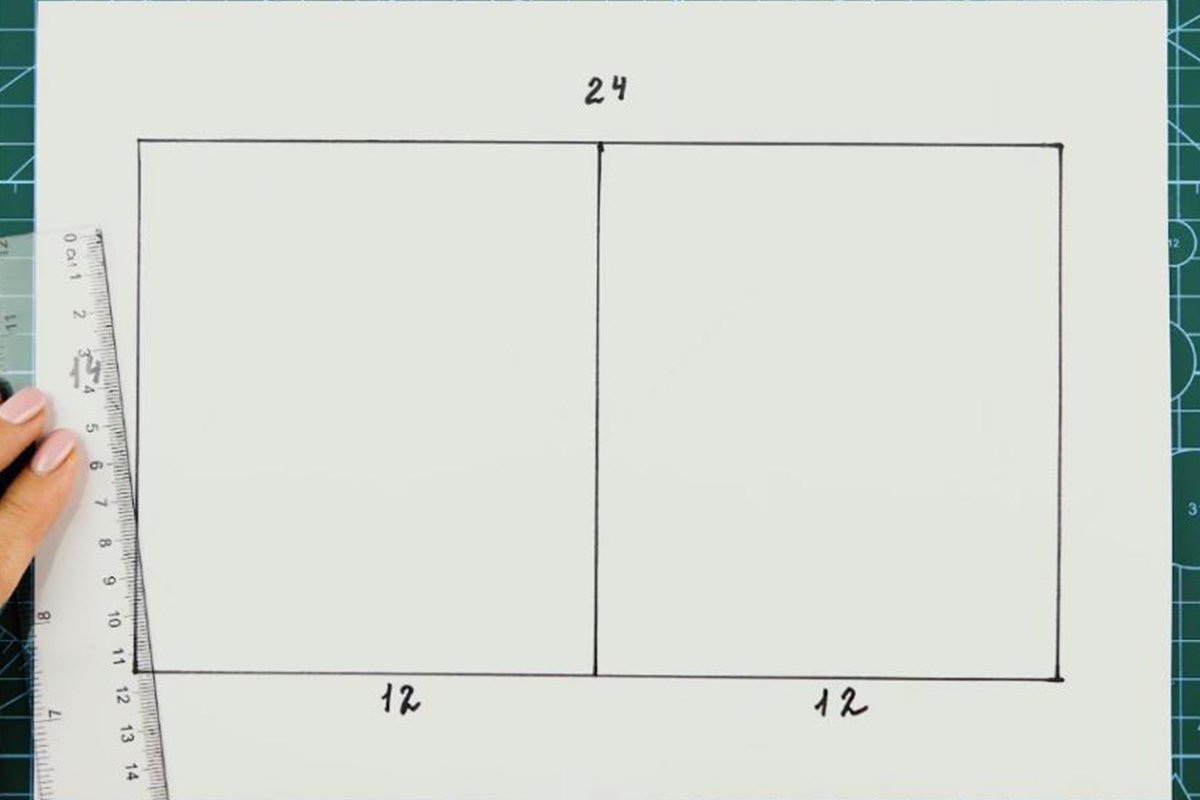
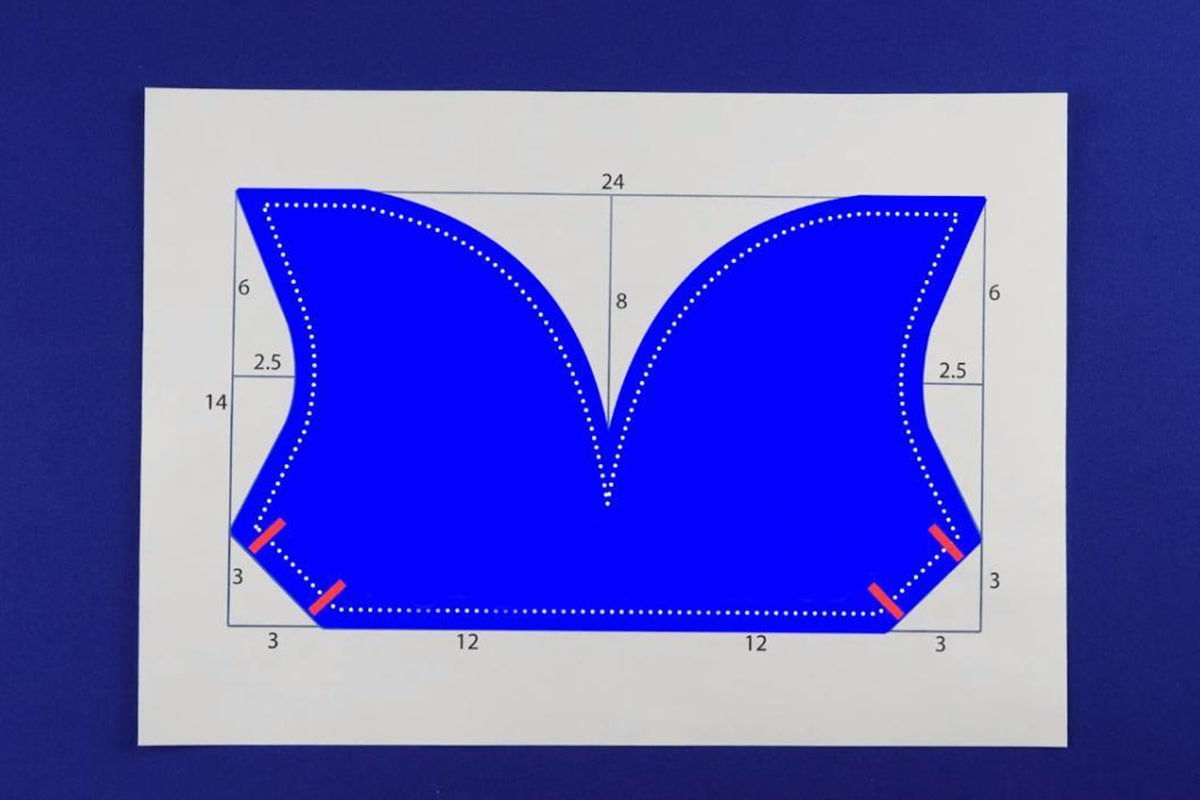
- To begin with, take an A4 paper sheet, a ruler and draw a rectangle, the length of which is 24 cm (9 ½ inches) and the width is 14 cm (5 ½ inches).

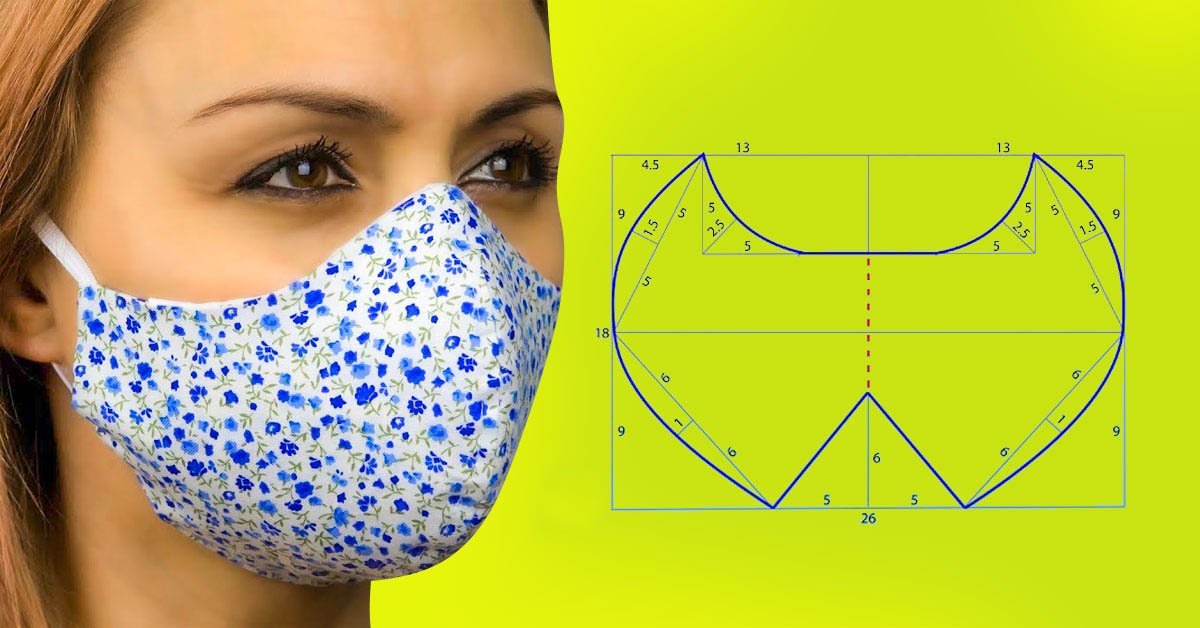
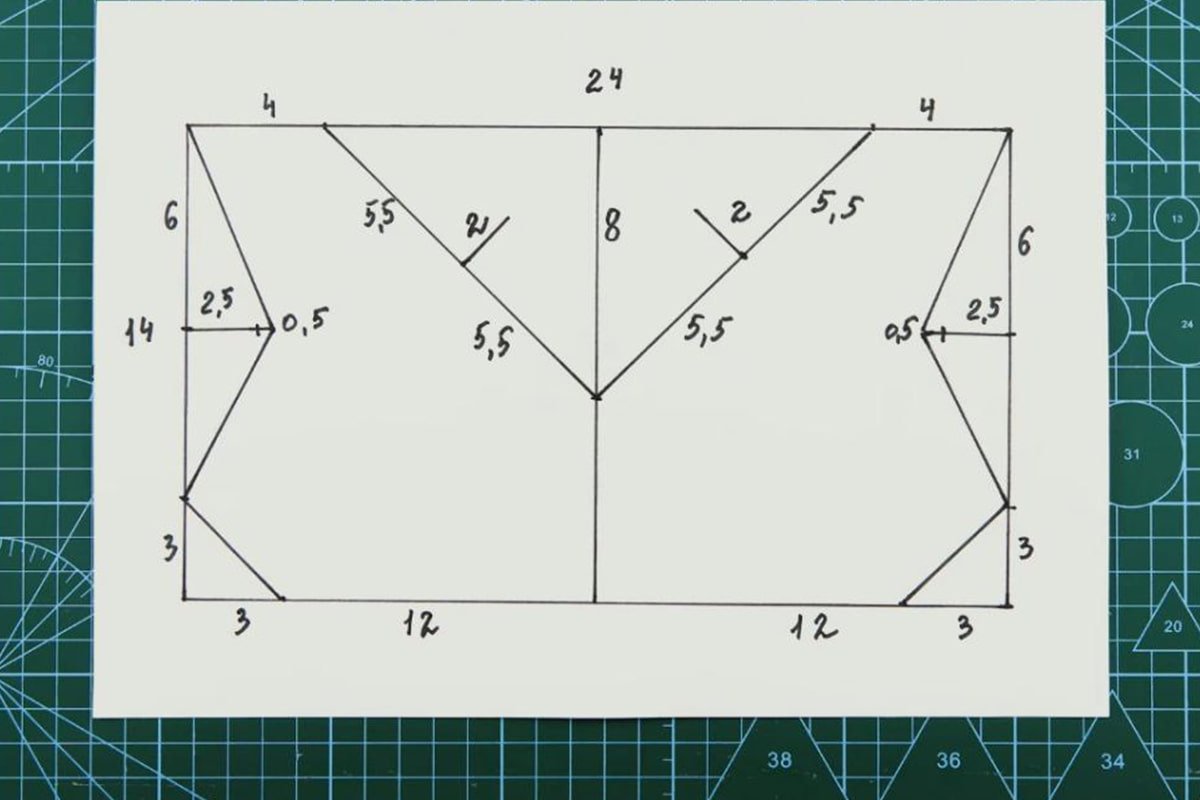
- Next, carefully measure and mark all the necessary lines, as shown in the photo. Measurements in the photo are in centimeters.
- Add a couple of marks on the sides of the pattern.
- Connect several marks with lines.
- Now let’s make our mask pattern more rounded.
- The blue part matches the required amount of fabric for two layers of the mask. The red stripes show where the rubber bands will be placed.
- The red part shows the size of the filter material. You can easily fit the filter into the inner pocket of the mask.
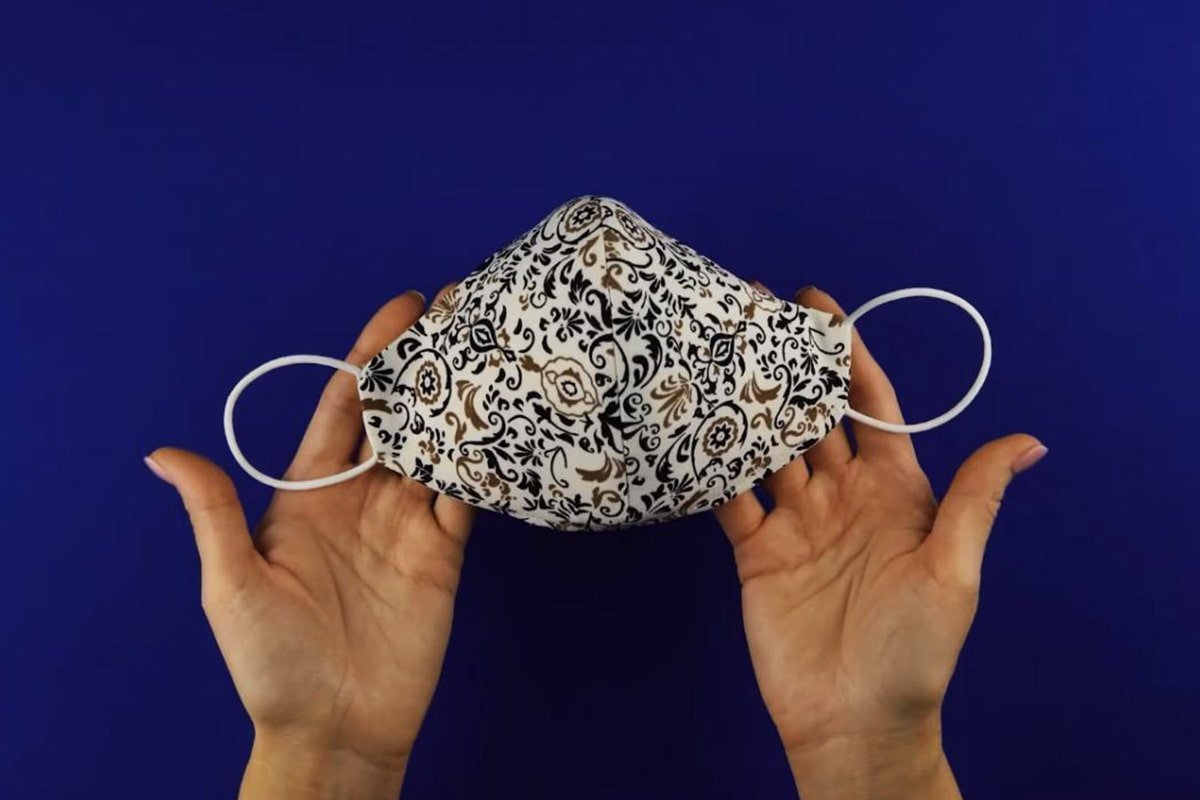
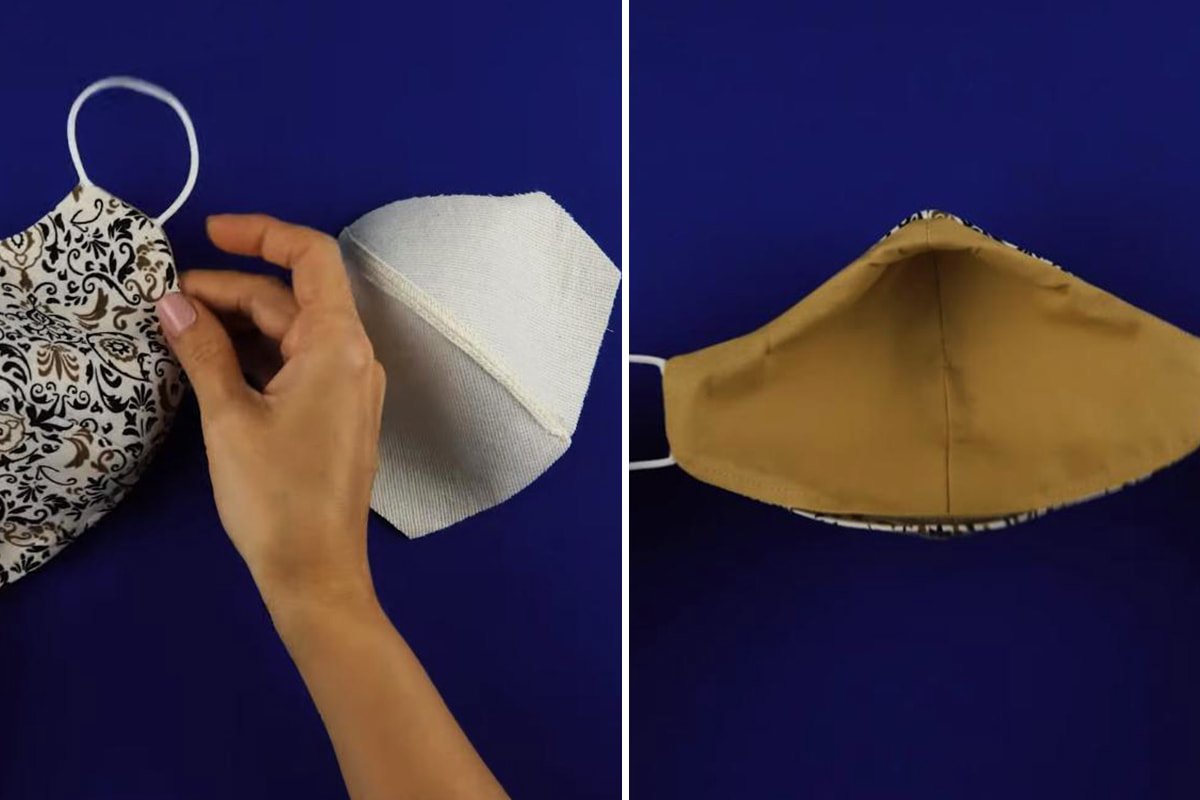
- Having cut out all the necessary parts from the fabric (3 in total), sew the two layers (cut out according to the blue pattern). Don’t forget to leave a filter pocket on the side of the chin. Also, place the elastic band in advance and sew the fabric on top. Done!


Now you know how to sew a fabric face mask at home. As you can see, anyone can do this. Follow the instructions and make a very convenient reusable mask. We wish you and your loved ones to stay healthy!
58 Comments Hide Comments
Comments are closed.
950571 139394Exceptional read, I just passed this onto a colleague who was performing slightly research on that. And he really bought me lunch as I identified it for him smile So let me rephrase that: Thank you for lunch! 660085
622185 663466I got what you mean , saved to bookmarks , extremely decent web site. 334659
691429 413385It can be difficult to write about this subject. I believe you did an excellent job though! Thanks for this! 144208
Can I show my graceful appreciation and show you exactly how to do really good stuff and if you want to
with no joke truthfully see Let me tell you a brief about how
to find good hackers for good price I am always here for yall you know that right?
Great work! That is the type of info that are meant to be shared across the net.
Shame on Google for now not positioning this submit higher!
Come on over and consult with my site . Thanks =)
You actually make it seem so easy with your presentation however
I find this topic to be actually one thing that I believe I would by no means understand.
It sort of feels too complex and extremely vast for me. I’m looking ahead on your subsequent post, I’ll try to get the grasp of it!
Hello There. I found your blog using msn. This is a really well
written article. I’ll be sure to bookmark it
and come back to read more of your useful
info. Thanks for the post. I will certainly
comeback.
I like what you guys are up too. This kind of
clever work and reporting! Keep up the great works guys I’ve added you guys to blogroll.
I was extremely pleased to uncover this website. I
wanted to thank you for your time just for this
fantastic read!! I definitely enjoyed every part of it and i
also have you saved as a favorite to look at new things in your website.
Do you have a spam issue on this website; I also am a blogger, and I was wondering your situation; we have created some nice practices and we are looking to exchange
solutions with other folks, be sure to shoot me an email if interested.
Pretty nice post. I just stumbled upon your blog and wished to say that I’ve really
enjoyed browsing your blog posts. In any case I
will be subscribing to your feed and I hope you write again soon!
Do you mind if I quote a couple of your posts as long as
I provide credit and sources back to your webpage?
My website is in the very same niche as yours and my visitors would really benefit
from a lot of the information you present here.
Please let me know if this ok with you. Thanks!